Crochet your own water bottle holder
Fun project to ease mind from school anxiety; project can hold up to a 32-ounce water bottle
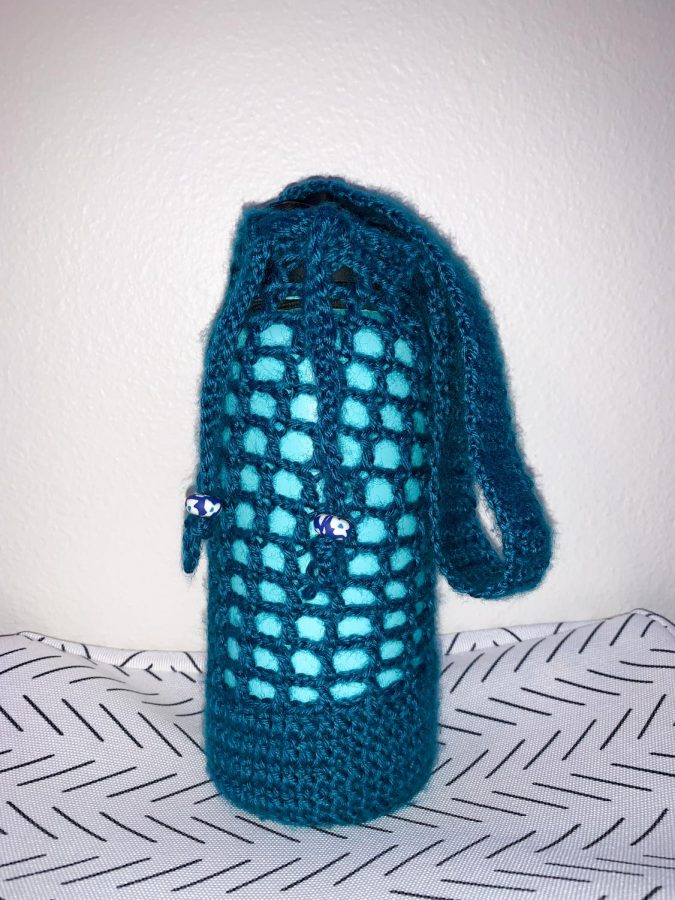
Crochet water bottle holder
August 25, 2021
The water bottle satchel crochet project is a beginner-friendly and super cute addition to your accessory wardrobe. It takes around five hours from start to finish if you are a slow crocheter like myself. It is a perfect way to pass time with school lingering in the back of our heads.
First, you will need size four yarn and a 5-millimeter size hook. You will also need a pair of scissors, a small crochet needle and fun medium-sized beads (optional).
This project is easy and fun for anyone to do. I just made a water bottle holder for a friend, so they do not have to carry their water bottle when school is in full force. It can hold up to a 32-ounce Hydro Flask and tie at the bottle’s neck to ensure it does not fall out.
Don’t be intimidated by this crochet holder. I messed up a few times in the beginning too. It takes practice and patience to create, so don’t give up if it takes a few tries.
Good luck, and have fun. Happy crocheting and welcome back to school!
Step 1: Beginning
- Create a magic circle
- Chain two
Step 2: Round 1
- Crochet 12 double crochet along the magic circle
- Tighten by pulling the loose end of the string
- Slip stitch into the second chain (this will complete the circle)
- Chain two
Step 3: Round 2
- Crochet two double crochets in the first stitch
- Repeat in every stitch to complete the second round
- Connect with a slip stitch and chain two
Step 4: Round 3
- Crochet two double crochets in the first stitch
- Crochet one double crochet in the second stitch
- Repeat this 2DC-1DC-2DC-1DC-2DC pattern in the remaining stitches to complete the third round
- Connect with a slip stitch and chain two
Step 5: Round 4
- Crochet two double crochets in the first stitch
- Crochet one double crochet in the second and third stitch
- Repeat 2DC-1DC-1DC-2DC-1DC-1DC-2DC pattern in the remaining stitches to complete the fourth round
- Connect with a slip stitch and chain two
Step 6: Row 1-4
- Crochet one double crochet in the first stitch
- Repeat in every stitch to complete the first row
- Connect with a slip stitch and chain two
- Repeat step six for three more rows
Step 7: Row 5-16
- Chain two
- Skip the first two stitches and crochet one double crochet into the third stitch
- Chain two and skip two stitches again, placing one double crochet in the third crochet
- Repeat this 1DC-1C-1C-1DC-1C-1C-1DC pattern in the remaining stitches to complete the fifth row
- Connect with a slip stitch and chain two
- Repeat step seven for 11 more rows.
Step 8: Row 17
- Crochet a single crochet in the first stitch
- Repeat this 1SC-1SC-1SC-1SC-1SC-1SC pattern in the remaining stitches to complete the 17th row
- Connect with a slip stitch and chain two
Step 9: Row 18
- Repeat step seven for one row only
- Take your scissors and cut about 4 inches of extra yarn at the end of your water bottle holder
- With your crochet hook, pull the yarn through the last loop and pull to tighten
- With your crochet needle, thread the yarn and sew the end yarn through the top of row 18 until it is completely gone
Step 10: Bottle String
- On a new piece of yarn, chain 102
- In the 99th chain or third from the end, crochet one single crochet
- In the remaining 98 stitches, crochet one single crochet and cut 4 inches of extra yarn at the end of the string
- Pull the yarn through the last loop and use your crochet needle to weave both yarn end pieces through the bottle string
Step 11: Handle/Strap Row 1
- Chain two crochet in the ninth stitch to the left of the seam
- Crochet six single crochets
- Chain two
Step 12: Row 2-70/150
- Crochet one single crochet in the second stitch
- Repeat for the remaining five stitches and chain two
- Repeat step 12 for 68 more rows to create a handle for your bottle
- Repeat step 12 for 148 more rows to create a cross body strap for your bottle
Step 13: Connecting the Strap
- Cut about 6 inches of extra yarn from the end of the strap
- Pull the yarn through the last loop and pull tight
- Sew the end of the strap with the yarn string ten stitches to the right of the bottle holders seem
- Use the string to continue sewing the end of the strap the bottle holder going from stitch 10 to stitch 16
Step 14: Add Beads (Optional)
- Add beads and tie a knot at the end of the bottle strings to add some extra flare