Mini crochet bag holds treasures
Simple project offers great place to keep crystals, money, trinkets you want close
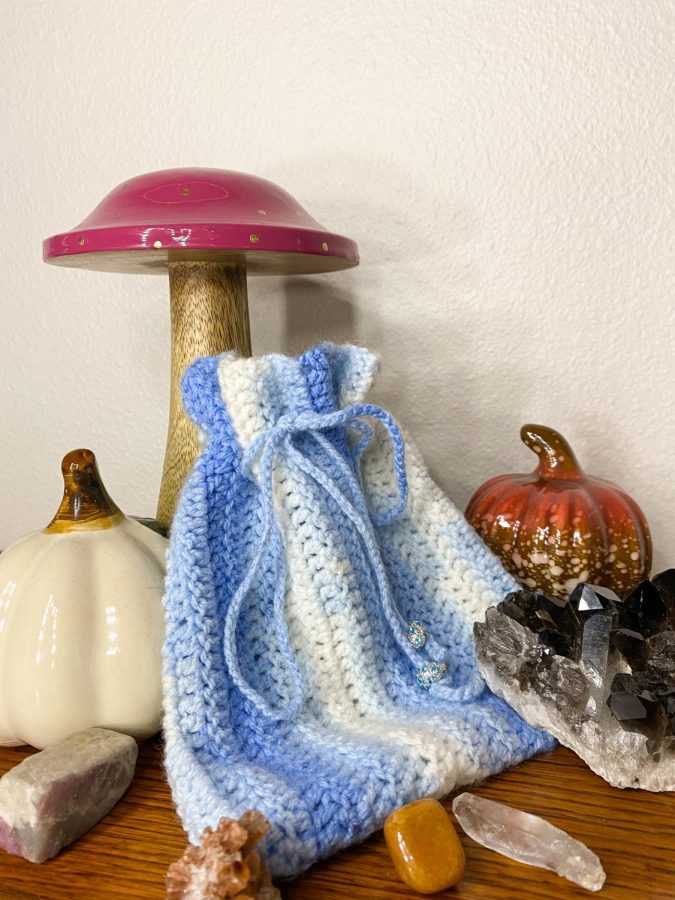
These bags can be made with leftover yarn and a 4-millimeter crochet hook.
September 8, 2021
This crochet bag is super easy and simple. It’s a beginner’s project that will have you leaving with more confidence than you came in with.
Consisting of only about eight or nine steps, this project should take you just under an hour and a half depending on how fast you crochet. As a slow crocheter myself, it took me about 2 hours to complete, however, most crocheters complete this project in around one and a half hours.
For my project, I decided to make a large crochet bag for my crystals so I can keep them in my car.
As someone who has gotten more interested in astrology in the past couple of years, I like to keep a bag of crystals with me when I’m driving for good luck and good intentions.
This project helped me create a brand new bag for my crystals. The bag is quart sized, and the yarn I chose was a stretchy material to ensure it can fit the max amount of items.
I used a 4 mm crochet hook and thin leftover yarn I had at home. It’s perfect for a gift for a friend or for packaging small items.
The bag can also be used for things like jewelry, small trinkets and anything important to you.
So without further ado, let’s make the bag! Who knows, it may carry something important to you later, and who would want to miss that?
Dimensions: 8 inches tall and 6 inches wide
Crochet hook size: 4 millimeters
Time: 1 1/2 hours
Step 1: Row 1: Chain 70
Step 2: Row 2-20: Double crochet in each stitch. To switch rows, chain an extra two, flip the piece and continue double crocheting in every stitch, starting with the second from the end.
Step 3: Creating the bag: Fold the rectangle vertically so it is 35 stitches tall and 20 rows wide. Single crochet 35 stitches to connect both sides of the bag to create the seam. I recommend starting with the top of the bag and crocheting down to the bottom so there is no leftover string.
Step 4: Other side of the bag: Repeat step three for the other side/seam of the bag and flip inside out so the seams are on the inside.
Step 5: The string: Chain 150 and sew the strings into the ends
Step 6: Weaving the string: On one side, in between the 10th string from both sides, thread one part of the string, then skip two rows on the left side and thread it through the bag.
Step 7: Finishing the string: Repeat step six and skip two rows until the string is fully threaded through the bag.
Step 8: Beads: Add beads of your choice to the strings to add some weight and keep the bag tied.
These instructions conclude the Crochet Bag tutorial. Enjoy your new bag to store important items. With everyone’s unique touch, these bags can be used for any reason.
So what are you waiting for? Make these bags for you, your friends and everyone else. They are easy, stylish and most importantly, made by your own hands.