Crochet bag for fall finds
Six-hour project requires acrylic, fuzzy yarn
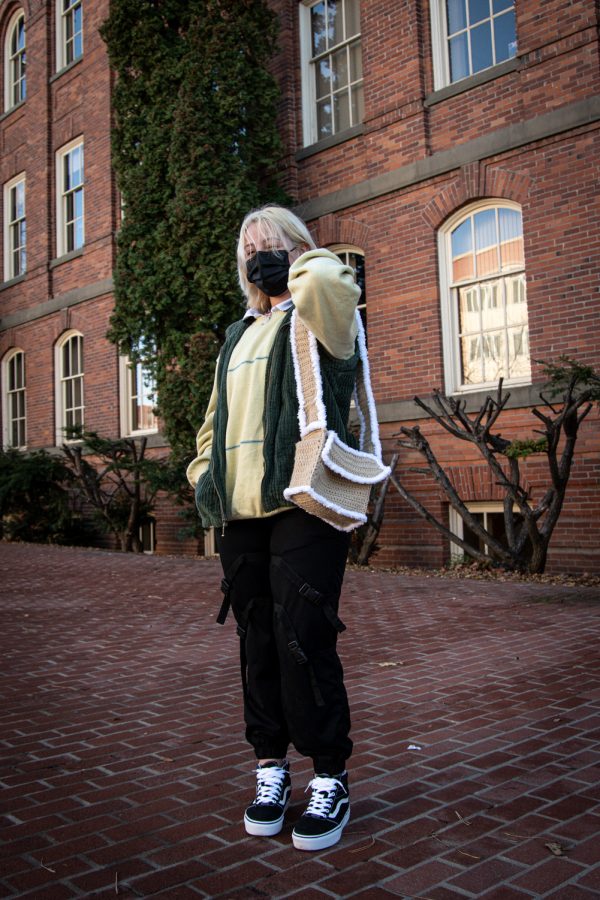
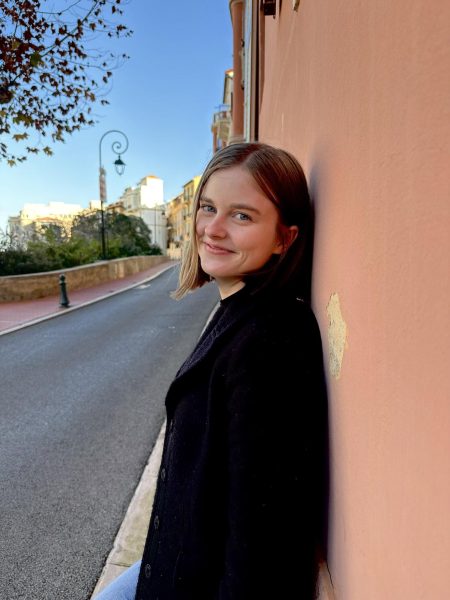
Mint reporter Lannan Ruiz is modeling a homemade purse she made herself.
November 10, 2021
Cold weather is fast approaching and that means winter and fall fashion is in full swing. Accessorize your look with this fuzzy outlined crochet bag! This project took me about 6 hours to complete from start to finish. Enjoy making it, and enjoy using it!
Supplies
- Skein of acrylic or other yarn
- Skein of fuzzy yarn
- Size 5.0 mm Crochet hook
- A lot of patience
Key
SC = Single Crochet
DC = Double Crochet
C = Chain
Tip
When crocheting on the tall side of pieces, connect them by putting two SC in the break between rows and SC one in the center of the rows.
Creating the Pieces
Step one: Two squares for the front and back panels (25 stitches wide and ten rows tall)
- C 25, then C one.
- (Row One) Beginning on the 24th stitch, SC 25 and C 2. Then in the 24th stitch, DC 25 and C one.
- Repeat for ten total rows.
- Repeat step one for the second rectangle.
Step two: One rectangle for top cover and flap (25 stitches wide and eight rows tall)
- C 25, then C one.
- (Row one) Beginning on the 24th stitch, SC 25 and C two. Then in the 24th stitch, DC 25 and C one.
- Repeat for four total rows.
- (Row five) Beginning in the 24th stitch, SC 25 in the front stitch, and C one. Then in the 24th stitch, DC 25 and C one.
- Repeat for three more rows to make eight rows.
Step three: two rectangles for side and bottom panels (12 stitches wide and ten rows tall)
- C12, then C one.
- (Row one) Beginning in the 11th, SC 12 and C two. Then in the 11th stitch, DC 12 and C one.
- Repeat for ten total rows.
- Repeat Step three for the second rectangle.
Step four: one rectangle for side and phone pouch (12 stitches wide and 18 rows tall)
- C 12, then C one.
- (Row one) Beginning in the 11th stitch, SC 12 and C two. Then in the 11th stitch, DC 12 and C one.
- Repeat for eight rows.
- (Row nine) Beginning in the 11th stitch, SC 25 in the front stitch, and C one. Then in the 11th stitch, DC 25 and C one.
- Repeat for nine more rows to make 18 rows.
Step five: one rectangle for long bag strap (8 stitches wide and 60 rows tall)
- C eight, then C one.
- (Row one) Beginning in the seventh stitch, SC eight and C two. Then in the seventh stitch, DC eight and C one.
- Repeat for 60 total rows.
Connecting The Pieces
Step six: Connecting the first square panel to the sides
- Take a square from step one and a rectangle from step three. Line up the extra single crochet row (25 stitches wide) with the tall side (10 rows) of the rectangle.
- SC 25 stitches through both panels.
- Take a rectangle from step three and line up the tall side (10 rows) of the square with the tall side (10 rows) of the rectangle.
- SC through both panels. SC two in the break between rows and SC one in the center of the rows.
- SC 12 together with the wide part (12 stitches) of the side rectangle with the wide part (12 stitches) of the bottom rectangle. They should connect at a joint corner.
Step seven: Connecting the second square panel to the sides
- Take a square from step one and make sure it’s in the same direction as the front square.
- SC the tall side (10 rows) of the square and tall side (10 rows) of the side rectangle together.
- SC 25 in the wide side (25 stitches) of the square to the tall side (10 rows) of the rectangle.
Step eight: Connecting the phone holder
- Fold the phone holder so eight rows are on top of the ten rows and it creates a pocket at the bottom for the phone. The base should have a half stitch sticking out on the outside.
- SC 12 along the wide part (12 stitches) of the bottom rectangle connecting it to the wide part (12 stitches) of the bottom of the phone holder.
- SC the tall side (10 rows total, eight of them will have two parts to crochet through, leaving the remaining two rows without the top part) of the phone holder to the tall side (10 rows) of the square.
Step nine: Connecting the top cover flap
- Place the top cover/flap so that the wide part of the rectangle (25 stitches) and extra single crochet row align with the wide part (25 stitches) of the back square/panel.
- SC 25 to connect the panels.
- SC from the other tall side (10 rows) of the phone holder to the tall side (10 rows) of the square to finish it off.
Step ten: Connecting the Strap
- Align the wide part (eight stitches) of the strap to the top of the wide part (12 stitches) of the phone holder, leaving two stitches on either side of the strap.
- SC eight at the beginning at the straps first stitch connecting them.
- Repeat for the other side of the strap and bag.
Adding the Fuzzy Detail
Step 11: The bottom outline
- Taking the fuzzy yarn, place SC one in every stitch, tracing along the bottom of the bag.
Step 12: The top cover flap
- Begin in the fourth row, SC toward the back of the bag.
- SC 25 along the back seam and wide part (25 stitches) of the bag.
- SC along the tall part (eight rows) on the cover flap, switching to SC 25 along the wide part (25 stitches).
- SC the remaining four rows of the tall part (eight rows).
- SC 25 along the wide part (25 stitches) of the half stitch that is sticking out.
Step 13: The strap
- SC eight to connect the wide side (12 stitches) of the side rectangle with the wide side (eight stitches) of the strap.
- SC up the tall side (60 rows) of the strap until your reach the other side.
- SC eight along the wide side of the strap (eight stitches) and the wide side (12 stitches) of the phone holder.
- Then SC up the other tall side (60 rows) until you reach the other side.