

DIY: Plarn Bag
Bag of plastic bags turns to reusable one
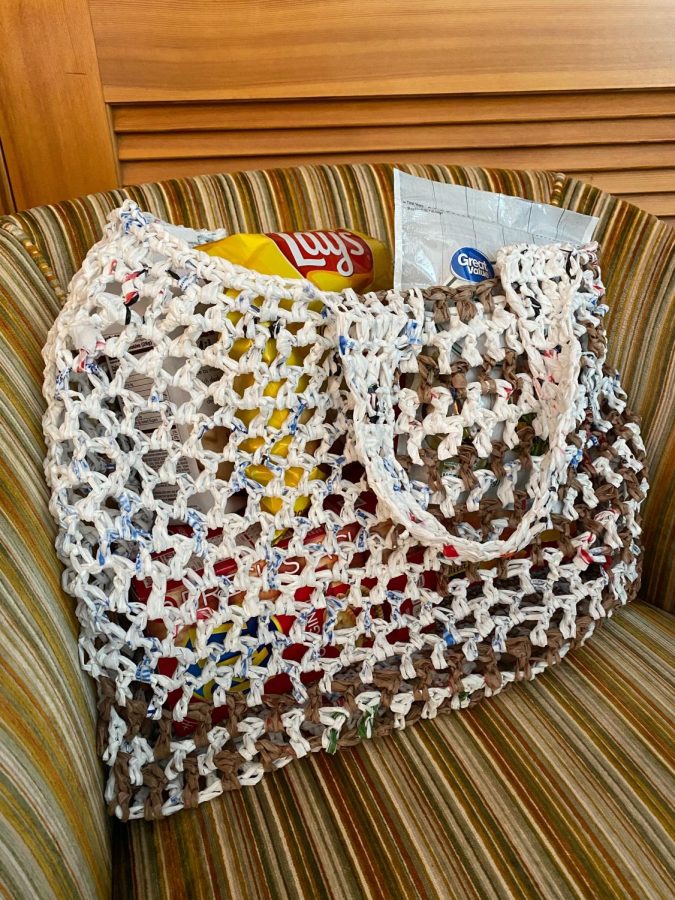
No more worrying about the bottom ripping with this bag.
June 12, 2020
Editor’s Note: This column has been amended to fix photos put in the wrong order.
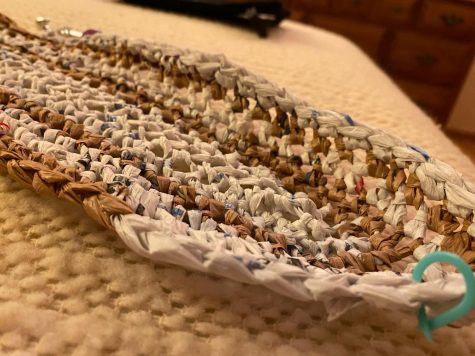
Maybe it was the four bags of plastic bags that sat on my kitchen counter taunting me, but something possessed me to crochet a bag made of plastic bags. It was really fun, it made me feel good about my impact on the environment, and it was EASY! I think it only took me a couple of hours to crochet the bag itself.
If you’re new to crochet, here’s a great website with the basic stitches and information so you, too, can upcycle away all those plastic bags! Search for the stitch or thing you need in its search bar, don’t just look for it on the home page.
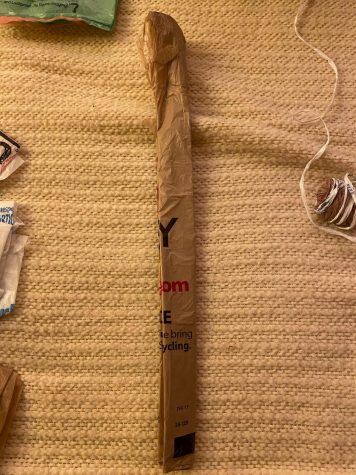
How To: Plarn
You’ll need a lot of plastic bags. The amount I ended up cutting up was about 60, giving me some extra plarn at the end. Bags without holes or obvious stretching from groceries are the only bags you’ll want to use.
For some context: we are not cutting a bag into one long string; instead, we are cutting the bag perpendicular to the handles and bottom to create loops of plastic bags that we will tie together. You may also opt to clean the bags, and I’m not sure the best way to do that in their “bag” form, but I wiped the plarn pieces with a Lysol wipe as I wound it into a ball.
STEP 1: Fold in the corners of the bag – the sides should fold in and collapse flat.
STEP 2: Fold the bag in half longways, so the handles are together.
STEP 3: Do this twice more, the bag will be about an inch or so wide.
STEP 4: Cut off the handles and the seam along the bottom.
STEP 5: Fold this strip in half shortways, so it’s half the length and cut.
You will make 15 cuts total.
STEP 6: Fold these in half and cut.
STEP 7: Fold those in half and cut.
STEP 8: Fold each remaining piece in half and cut.
You should have 16 pieces of cut bag, and each piece should be a complete loop.
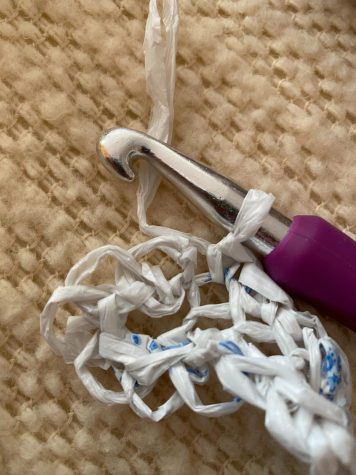
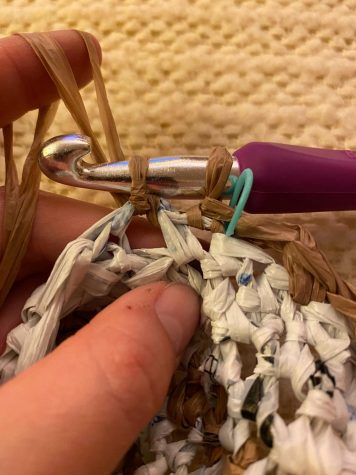
STEP 9: Tie all loops together, using a lark’s head knot.
Tips:
- You don’t need the knot to be super tight, just tight enough to hold it together; the knots are easy to crochet around and over.
- Pull the knot tight with your hands and fingers closer together than farther apart, you’ll have better control and won’t stretch the plastic
- Make sure that your knots are at opposite ends of the bag; you can use the seam, or just flatten the loop out so you make sure the new loop is attached exactly opposite
- I used three white bags and then one brown bag to give my bag a sort of random pattern – if you want to do this, I’d recommend changing how many white bags so it’s actually random; you could also just randomly use different colored bags to make the bag unique or use all bags of one color!
STEP 10: Wind into a ball for use!
If you get stuck, check out this YouTube video.
Large Market Bag Pattern – 21 inches width x 15 inches heigh
Hook: N/9 millimeter; for a smaller bag consider K or L. I love these ergonomic hooks, they don’t hurt the joints in my hands after a long day of crocheting.
Yarn: About 50 bags worth of plarn; alternatively, you could use two skeins of Medium Weight (4) acrylic yarn at the same time (or sub-in if you run out of plarn!)
Tension: Do not use any tension, the plarn (while strong once crocheted) will stretch and weaken it; it’ll also be a nightmare to fit an N hook through your stitches – don’t pull the working plarn tight
Gauge: Not important
Additional: Removable stitch markers – at least five
Abbreviations:
- Ch – chain
- St/sts – stitch/stitches
- Sc – single crochet
- Dc – double crochet
- Pm – place marker
- Rm – remove marker
- Rnd – round
- Dec – decrease
- Inc – increase
- Sl st – slip stitch
- Instructions within [brackets] indicate that everything goes in one stitch
- Instructions between *asterisks* indicate to repeat those steps, and the amount will be specified
- Numbers at the ends of rounds in (parenthesis) indicate how many working sts you should have
NOTE: You will join in the round for only the first five rounds, the majority of the body will be worked in a spiral, joining in the round for the handle transition at the end.
BODY
RND1
- Ch 35
- Pm in second st from hook, five sc in this stitch
This is the start of your round.
- 1 sc in each ch, stopping before the last ch
- 5 sc in last ch
- 1 sc in each ch
This would be considered the other “leg” of the “v”
- Join in the rnd at your marker, ch1, rm (74)
If you are a newer crocheter, the ch1 at the end of the rnd does not count as a st, instead it allows the next rnd to grow in height
RND2
- 1 sc in next st, pm
- 2 sc in next 2 sts
- 35 sc
- 2 sc in next 2 sts
- 1sc in all remaining sts
- Join, ch1, rm (78)
RND3
- 1 sc, pm
- [3 sc]
- 39 sc
- [3 sc]
- Sc in all remaining sts
- Join, ch1, rm (82)
RND4
- 1 sc, pm
- [3sc]
- 41 sc
- [3 sc]
- Sc in all remaining sts
- Join, ch1, rm (86)
RND5 – this is the last round you will join at the end
- 1 sc, pm
- [3 sc]
- 43 sc
- [3 sc]
- Sc in all remaining sts
- Join, ch1, rm
RND6
- [2 sc], pm on first sc st
- 1 sc
- [2 sc]
- 43 sc
- [2 sc]
- 1 sc
- [2 sc]
- Sc in all remaining sts, rm (94)
- DO NOT JOIN!
For you experienced crocheters, I changed the three [3] to two [2] to square out the base of the bag.
ROW7
- Pm in first of 94 sc, rm
I opt out of using a stitch marker from here forward, either using the tail of my work or placing it on a lower row to keep me on track; we are now working on the walls of the bag!
ROW8
- Sc, pm
- *Ch1, skip one, sc*
- Repeat between ** to end, rm
You will end on a ch1
ROW9
- Sc into where the marker was, pm
- *Sc into the ch space you made last row, ch1*
- Repeat between ** to end, rm
You will end on a sc
ROW 10-End of Body
- Sc, pm on row below
- *Ch1, dc* to end of body
Mine was about 10 inches when I started the transition and handles
FINISH ROW 1 (optional, these next two rows will close the top just a little do it’s not straight up)
- Dc in all spaces, pm on first st
- Rm, join in the rnd, ch3
FINISH ROW 2 (optional)
- Dc in spaces between last row’s dc, pm on first st
- Rm, join, ch1
HANDLES TRANSITION
- Mark center 13 sts on each side
- *Sc, ch1* pm on first sc, continue until first handle marker
You should end on ch1, adjust your handle markers accordingly
HANDLE ROWS 1-2
- 5 dc, ch3, turn (5)
HANDLE ROW 3
- Dc dec
- Dc
- Dc dec, ch3, turn (3)
HANDLE ROW 4-16
- 3 dc, ch3, turn (3)
HANDLE ROW 17
- Dc inc
- Dc
- Dc inc, ch3, turn (5)
HANDLE ROW 18-19
- 5 dc, ch2, turn (5)
ATTACHING HANDLE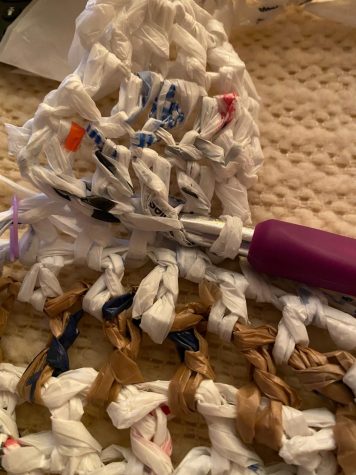
- Position handle edge on the inside side of the bag, five stitches before second handle marker
- Push hook through last dc st on the handle and grab plarn through the ch space on the bag
- Sl st in each of the five ch spaces before second handle marker
REPEAT
- HANDLES TRANSITION to next handle marker
- All HANDLE ROWS and ATTACHING HANDLE
- HANDLES TRANSITION to marker on first st of HANDLES TRANSITION
End on ch1
FINISH
- Ending on ch, sl st into first st marker
- Tie off


kelvin • Jun 12, 2020 at 4:24 am
I love making use of bags because they have proven very useful especially when carrying a lot of things. I have used a lot of bags pack and now I could say if not for the bag packs I have used I would have not done a lot of things. There are lots of things you could do with your bags, you use them to take out trash, carry books and lots of other important. even with the bags being useful, people still become careless with them by trashing it in the ocean which is really affecting ocean life.This content is containing information that you would find far more interesting than you think. With this link you can gain access to a splendid content and a nice site where you would find information that would be useful to you.