DIY: Create friendship bracelets
Make braids, basic knots, candy stripes, chevron for your friends or yourself
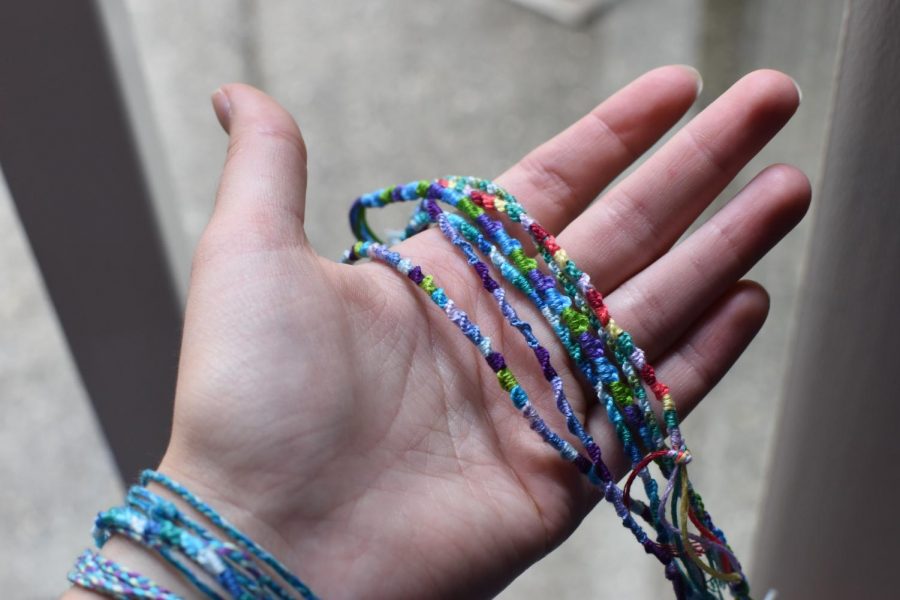
Friendship bracelets are a great summertime craft because you can put them on your wrist, ankle or keychain.
June 19, 2020
Summer quarantine boredom seems to be reaching an all-time high — fortunately, there are plenty of crafts to keep you entertained while you watch Netflix on your couch or soak up the sun.
Friendship bracelets are some of my favorite summertime crafts because they are cheap to make and there are dozens of patterns to follow. Plus, they double as anklets, or you can make them short to decorate a key chain.
As a bonus, you can make a bunch of bracelets to give to friends or use them to make some new friends. No one turns down a colorful piece of jewelry.
To make these, you only need three to five colors of embroidery floss (less than a dollar per skein at Walmart or any craft store) and a safety pin. You can get fancy with beads or more colors, but that is really all you need to make these basic designs.
Braid
Materials: Use three colors of embroidery floss for a braid. I like to pick three shades of the same color — like a light blue, medium blue and royal blue — but you can choose any three you want.
Prep: Cut about a yard of each color. Knot the three strands together at one end, leaving about 2-3 inches hanging off. Insert the safety pin into the knot and pin it to a pillow, blanket or your pants while you work. You can also tape the knot onto a table or desk in front of you.
Steps:
This is just like braiding hair. You have left, middle and right strands.
- Cross the left strand over the middle strand — now those two strands have switched positions.
- Now cross the right over the middle. Once again, the strands have switched positions.
- Continue to cross left over middle, right over middle, making sure the strands switch their relative positions each time they cross.
- Repeat this action until you have braided all the way to the end of the strands. Leave about 2-3 unbraided inches at the end.
- Tie a knot. Then tie the two ends of the braid together to make your completed bracelet.
I recommend using about a yard of embroidery floss for braids because they are very thin and I like to be able to wrap them around my wrist multiple times.
Basic knotted
Materials: I suggest four colors of embroidery floss to get a desirable thickness. You can use three, five and even 10 colors, but remember that the more colors you add, the thicker your bracelet will be.
Prep: Depending on how big your wrist (or ankle) is, you may have to play around with the length of the floss you use. I recommend measuring a length from the tip of your nose to your fingers (about a yard, give or take).
Knot all four strands together, leaving 2-3 inches hanging off at the end.
Steps:
Now, time to learn the basic knot of friendship bracelets.
- Separate the color that is on the far left from the other three strands. About halfway down the leftmost strand, bend it — it should be perpendicular to the other three. Make sure the perpendicular portion is underneath the other three strands. It should look like a number “4.”
- Now, take the loose end of the strand (it should be to the right of the other strands) and put it through the loop (on the left) you created. Pull the knot tight. This is the basic knot that you will repeat for the rest of the bracelet and for all other patterns.
- Repeat this two, three or four more times, depending on how thick you want that color band to be.
- Now there is a different color on the left. Repeat the same steps as above, being careful to make the same number of knots (this is simply for a consistent-looking pattern).
- Repeat these steps with each of the four colors.
- Once the starting color is on the left, continue to repeat these steps. Make sure the colors stay in the same order and you use the same number of knots for each color. (Although, when you get to making more advanced bracelets, you can play around with these variables.)
- Check periodically to see if the bracelet is long enough to fit around your wrist. Once it is, tie a knot, making sure to leave 2-3 inches of loose floss at the end. To fasten around your wrist, simply ask a friend to tie the two loose ends together.
Candy stripe
Materials: For this, you will need any number of strands. I usually use four, just for simplicity.
Prep: Cut about a yard of each thread.
Steps:
The candy stripe is very simple once you master the basic knot. Remember, just make a “4.”
- Instead of using the leftmost strand to knot around all of the other colors, you will knot it around each color one at a time, proceeding from left to right.
- To do this, separate the leftmost strand and make the “4” knot around the strand just to the right of it. Repeat this once more.
- Now move the second color out of the way and repeat those two knots on the third strand (two to the right of the leftmost).
- Again, move the third strand out of the way and repeat those two knots with the fourth strand.
- Now there is a different color in the leftmost position. Repeat the same steps from the first color — two knots on each strand to the right of the first.
- Continue repeating these steps until you have about 2-3 inches loose at the end. Make a knot and tie the two ends together.
Chevron
Materials: Use any number of different colors, but I recommend four. This pattern is more difficult for more colors.
Prep: You will need twice as much floss as you have used for the other patterns, which you can measure by holding the floss against your wingspan.
Instead of tying the strands together as done previously, fold the floss in half. Now make a slipknot near the fold.
Steps:
The chevron pattern is almost like the candy stripe but doubled over.
- Separate the strands so you have half the strands on the left and half on the right. Make sure there is one of each color in each half and make sure the order of colors going inward is the same. For example: red, orange, yellow, green, green, yellow, orange, red.
- Starting on the left, make two of the basic “4” knots using the leftmost color on the strand just to the right.
- As with the candy stripe, move the second color out of the way and make two knots on the third strand using the leftmost color.
- Repeat with the final thread color on that half.
- Now you will repeat these steps, but mirrored on the other half. The “4” will be backward, but the idea is the same. Start with the rightmost strand and knot it twice around the strand just to the left. Repeat this step with the next two strands.
- Now the colors that were previously on the outside should be next to each other on the inside. For example: orange, yellow, green, red, red, green, yellow, orange.
- Knot the two inside colors together twice.
- There is a different color in the outside position now. Repeat the previous steps, knotting from the outside in, and then tying the innermost colors together.
- Do this until you have about 2-3 loose inches at the end. Tie a knot. Use the loop you made at the beginning to connect to the end knot.